A Better Pan of Roasted Carrots
A tray of carrots, a bowl of yogurt, and a close look at the small decisions that make a vegetable worth building dinner around.
8 min read
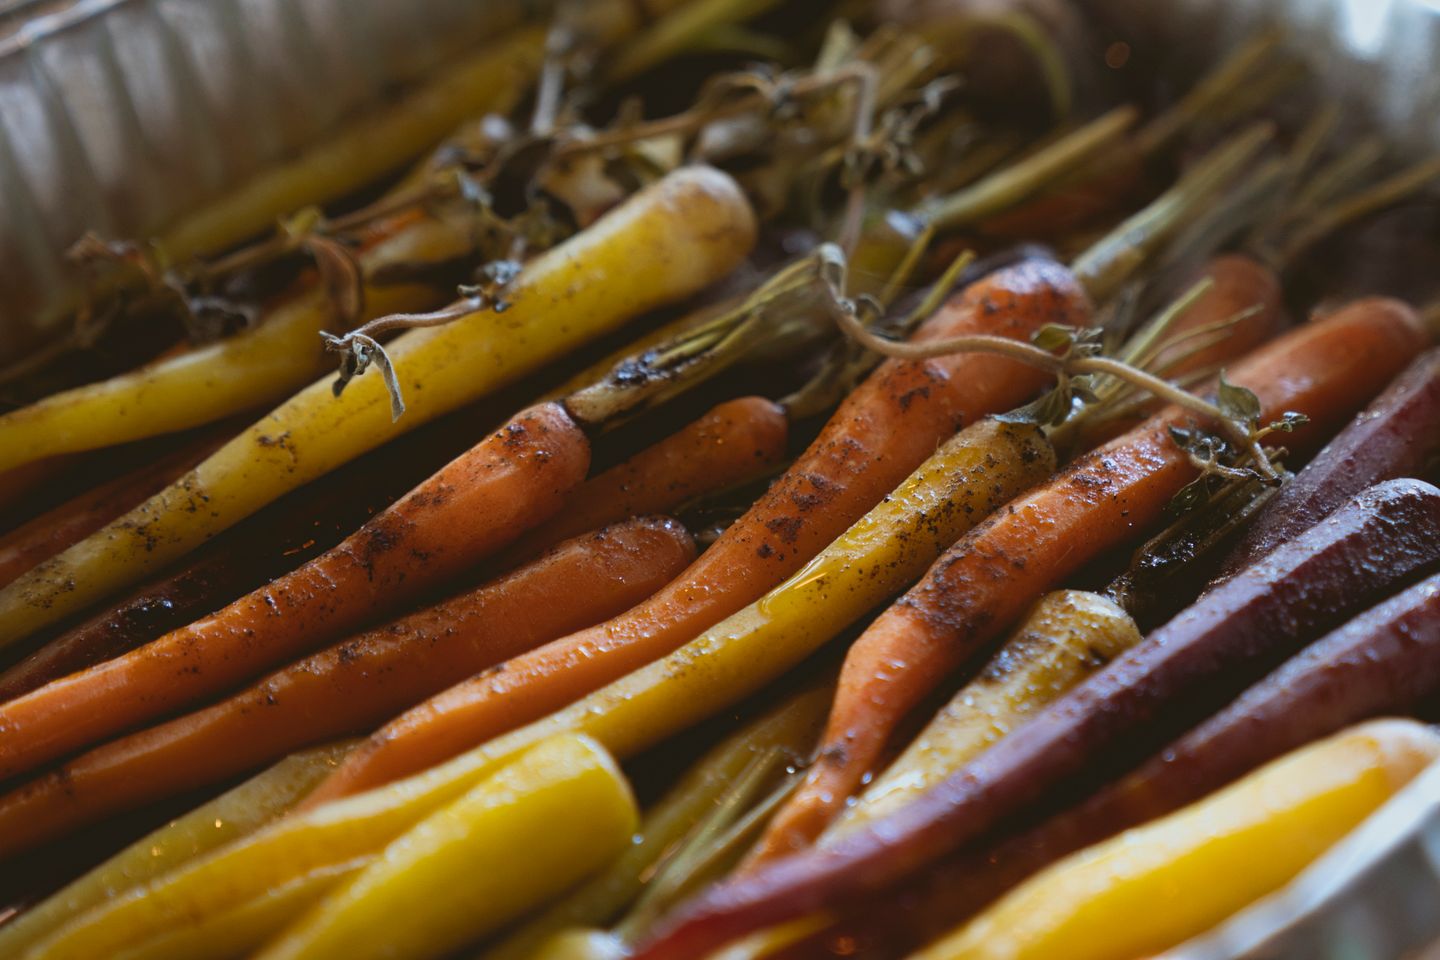
The narrow end of a carrot can burn while the shoulder still feels like a stick. That's the first problem worth solving when you roast a bunch. Getting every carrot to look as though it came from the same mold would solve it, but you can get much further with a cutting board. Put the thinnest ones in one group, split the stout ones through the middle, and look for pieces of roughly the same thickness where they are widest. The exact length hardly matters. A fork goes through the middle, not down the full length of the carrot.
This dinner is built around carrots with deep brown patches and enough bite to pick up from a plate. Cool yogurt gives them something to drag through, and toasted seeds give them a little crackle. The seasoning stays plain until the pan comes out, when lemon and a few herbs bring the sweeter edges into focus. The same carrots can sit next to roast chicken or a bowl of grains. With beans and bread, they make dinner on their own.
At the cutting board
For four side portions or two generous main portions, start with about 700 grams of carrots. Use 2 tablespoons of olive oil, ½ teaspoon fine salt, 180 grams of plain thick yogurt, one lemon, 2 tablespoons pumpkin seeds, and a small handful of parsley or dill. If this is dinner, add one 400 gram can of white beans, drained and rinsed, and bread for the table. Keep a little additional olive oil and salt nearby to finish. A mix of carrot colors is welcome. Orange carrots give you the clearest visual signal as they brown, so put a few on the side of the pan you can see when you open the door.
Scrub the roots under running water and trim off the stem ends and any fine roots. Peel them if the skins are thick or bitter. Thin, smooth skins are good to leave in place. Dry the carrots with a towel. Water clinging to the surface has to evaporate before that spot can brown, and in a tight pan it contributes to the steam that makes every piece pale. If the carrots were washed earlier and sat in a colander, dry them again once you cut them. The fresh faces can carry quite a bit of moisture even if the skins feel dry.
Cut large carrots in half across the middle, then split the thick sections lengthwise into halves or quarters. Keep the thin ends in larger pieces and leave pencil-thin carrots whole. Aim for pieces about a thumb's width at their thickest. If one piece is closer to the width of two thumbs, split it again. The flat faces make good contact with a metal pan. When the carrots vary dramatically in size, leave a small space between the groups so you can pull the little pieces out without rearranging the entire tray.
Put the flat sides down
Heat the oven to 220°C or 425°F with a rack in the middle. Use a rimmed metal sheet pan large enough for the carrots to fit in a single layer with visible gaps. A medium pan works if the carrots are modest and you have a generous oven. If the pieces overlap, use two pans. Either switch their positions partway through cooking or roast one after the other if you want to compare the results. Crowding is more damaging than a few extra minutes at the stove.
Toss the dry carrots with the olive oil and salt. Coat the wide cut faces as well as the edges. There should be enough oil to make the surface shine faintly. If it pools at the bottom of the bowl, pick up the pieces and leave the excess behind. Set the flat faces against the pan. The side touching metal usually takes color first, so judging by what you see through the oven window can be misleading. A carrot can look merely dusty on top and have a beautifully roasted underside.
Start checking after about 18 minutes. Use a thin spatula to lift a broad piece. If it clings, try again in a few minutes. Once the underside has good color, turn the thickest pieces and let them roast until a fork goes through the center without a jolt. Pieces around the suggested size often take 25 to 35 minutes. Small roots can be ready sooner and unusually thick pieces may need longer. Pull the tender ones first if the tray finishes unevenly. For the rest, turn down the oven a little if the color is advancing faster than the middle can soften.
Read the edges before you add anything
The good brown spots can be quite dark. They smell sweet and nutty, and a knife slides through them without cracking. Papery ends and black edges that smell harsh have gone too far. Trim off an unpleasant tip and taste the next bite before deciding what happened to the rest of the pan. If several tips are nearly burnt but the centers are still firm, nudge the carrots closer together briefly and lower the oven temperature. Less exposure gives the interiors a chance to catch up. A fresh batch next time will benefit more from different cuts than from a new set of seasonings.
When the carrots are tender but pale, check whether you gave them a flat face against the metal. There may be enough heat for one last pass on the pale sides with a little space around each. Take the tender pieces off the pan as soon as you like their color, since the hot sheet continues to cook the surface. If they are going on yogurt, give them a few minutes to stop steaming. A hot carrot is fine on a cool plate, but a trail of steam and water can thin the yogurt before anyone sits down.
There is a tempting point near the end when it seems sensible to add honey. A carrot that has just lost water and picked up color already has plenty of concentrated sweetness. Taste one first. If the batch is rather bland, a few more grains of salt and a squeeze of lemon are worth trying before the honey jar. Add a little honey after roasting only if you want the extra sweetness. It can also be stirred into the yogurt, where it will give you a different bite than it would on the warm roots.
Make a cold base and a dry topping
While the carrots roast, stir a little finely grated lemon zest and a pinch of salt into the yogurt. Taste, then squeeze in lemon a few drops at a time. If your yogurt is already tangy, it may need very little juice. If it is so thick that it cracks when you draw a spoon through it, loosen it with a teaspoon of water and stir again. You want it to hold its shape when spread on a plate. The easiest way to find out is to draw the back of a spoon through a small dollop and see whether the line remains.
Toast the pumpkin seeds in a dry skillet over medium heat. Shake the skillet frequently and stop once the seeds smell fragrant and a few begin to pop. Tip them onto a dry plate immediately. A hot skillet will keep browning them even after the burner goes off. Let the seeds cool apart from the carrots so they stay dry, and taste one. Large seeds that bend when you bite them could use a little more time. Sunflower seeds work too. Roughly chopped almonds can be used if everyone at the table can eat them.
For a dinner with beans, warm the rinsed beans separately in a saucepan with a splash of water and a little salt. You can crush a spoonful against the side if you want the beans to take on a creamier texture. Drain off any obvious extra liquid. Season gently with olive oil and a squeeze of lemon. A plain can of beans can taste good with nothing more, especially if the carrots and herbs are bringing their own flavors to the plate. If you want garlic, rub a cut clove over the toast before setting it on the table.
Build the plate around the good parts
Spread the yogurt on a shallow dish. Lift the carrots onto it with a spatula, keeping some of the dark sides visible. If using beans, spoon them around the carrots or offer them in a bowl with the bread. Squeeze a little lemon over the warm vegetables and try a bite with both yogurt and carrot. That is the useful tasting bite, because the yogurt has its own salt and acidity. Scatter the herbs and seeds at the table. If dinner has to wait for somebody, keep the seeds in a little bowl and add them when everyone is ready.
You can change the herb and the base according to what is in the refrigerator. A thicker spoonable labneh makes the plate richer and may already be salty. For a dairy-free base, a plain unsweetened plant yogurt works if you like its taste on its own. Parsley keeps the focus on the carrot. Dill gives the dish a sharper fragrance, and mint is especially good with a little ground cumin rubbed onto the carrots before roasting. Try one adjustment at a time. A pinch of cumin scattered over half the tray makes a useful side-by-side tasting without committing the whole dinner.
Any carrots you want to save should be kept separate from the yogurt and seeds and refrigerated promptly. For the next meal, slide the carrots into a hot skillet for a few minutes to restore some of the browned surface. A toasted sandwich is another place for them. Halve the thick pieces again, spread a little yogurt on the bread, and add beans or a handful of greens. Leave the sandwich open and eat it with a fork if you want to preserve the seeds' crunch. The shapes that seemed inconvenient on the original tray are good in a lunch like this, especially the thin ends that disappear into the first few bites.